Showing posts with label scrapbook. Show all posts

Monday, January 14, 2013

Wedding Shadowbox

I saw something like this somewhere and it inspired me to make this. It's a shadowbox filled with stuff from my wedding that I wanted to display, but keep safe. This was pretty easy and fun to make and I love looking at it hanging in our hallway.

 Materials:
12"x12" Shadowbox (about 1" thick)
Scrapbook paper for the background
Tape
Pins
Accessories you want to display


My shadow box included my veil, garter, hair comb, my husband's sheriff badge (we got married on a ranch), our program and one of the bookmarks that we gave as favors. The hardest part of making this was figuring out how to lay it all out so that everything could be seen, but look nice all together. As a rule thumb, the larger objects should go in the background and the smaller objects on top. Layering the items adds interest, just don't block anything important. And you should definitely try to use a contrasting background color paper. If all your items are light, use a dark background and if they're all dark, use a light background.


After playing around with it for about 20 minutes, I settled on this.


First, I laid the program down in the background and taped it to the background paper. Then, I taped down the comb of my veil so that the comb was under the fabric. I knew the book mark would cover this so I wasn't worried about about the tape showing. Then I attached my garter and the comb. These were trickier because I didn't want any tape or anything showing. I used sewing pins and poked them through the garter and comb and into the cardboard backing. If you get a shadowbox with a fabric background, it would be easier to attach. My shadowbox was pretty cheap, so it only had cardboard in the back. It was a little more difficult to get the pins to go through, but not impossible. I put the pins through the inside of the garter and folded it down so they won't show.


 The sheriff badge already had a pin on the back, so I just stuck that through. For the bookmark, I knew it would be pressed against the glass by my veil, but just to keep it from shifting after I close it up, I added folded over tape to the back of it.

Lastly, I decided that the top of the box looked a little bare, so I cut out a little calendar from a piece of scrapbook paper and circled our wedding date.


Then all I had to do was carefully put the frame around it and hang it without letting anything move. It took a couple tries to close it without letting anything move, but I think it's worth it! Just don't hang it in direct sunlight wear it will fade your precious items.


The Nikon D7000 is the camera I use for all my blog photos.

Tuesday, October 2, 2012

How to Decoupage Pumpkins

Today, I wanted to start my Halloween themed projects for October. The first one of these projects is decoupaged plastic or styrofoam pumpkins. I thought these were a really cute alternative to plain pumpkins. This is pretty simple, although it can be a little messy and you will difinietly have you hands covered in Mod Podge by the end of it.


Materials

Foam/Plastic Pumpkin
3-4 sheets Scrapbook Paper
Modpodge
Wide Paint Brush
Bowl
Water
Scissors/Exacto Knife
Paper Slicer (optional)


The main idea is that you’ll put one piece of paper over each rib (the vertical stripes) of the pumpkin. If your pumpkin is very symmetrical and even, you can cut all the strips of paper the same size. If the width of the ribs in the pumpkin vary, you should measure each one before you cut it. This pumpkin was very even, so each strip of paper was just over 2”.
Start by measuring for your first strip of paper. Be sure to allow for the depth of the rib by rolling the ruler around the rib as you measure.

Then cut one strip of paper at that width.

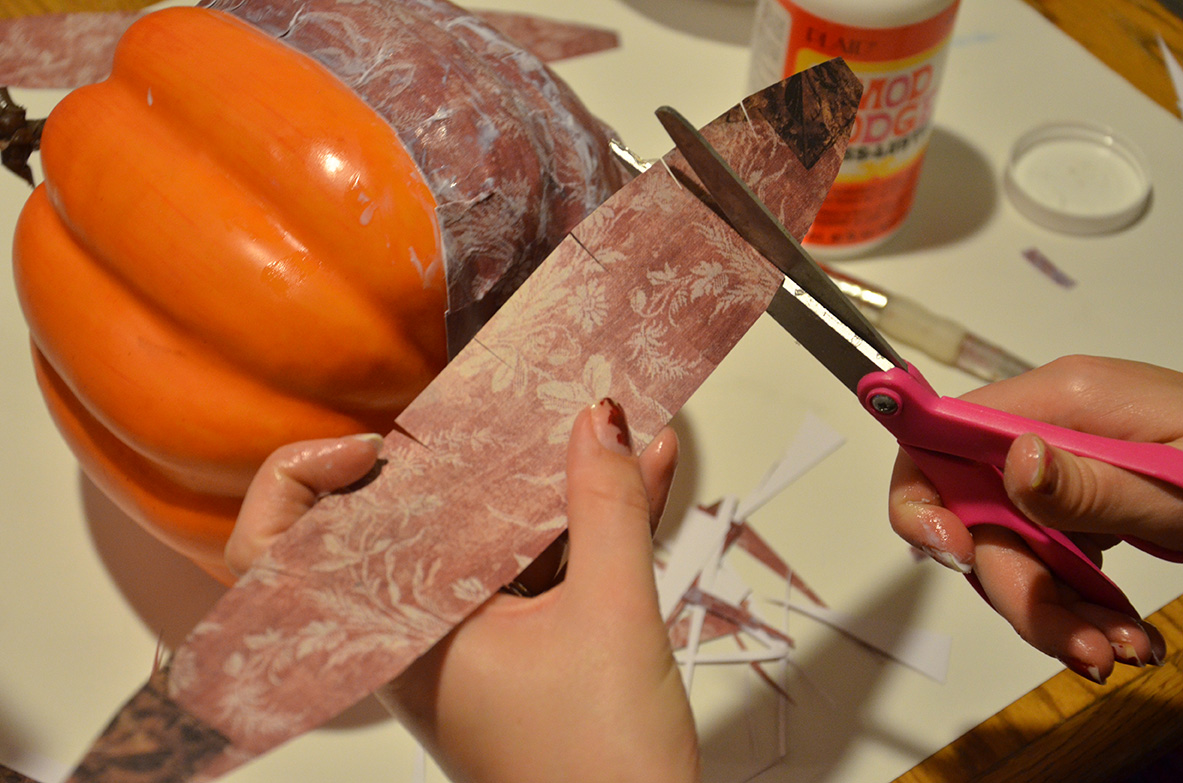
Round off the top and bottom of the strip to match the curve of the pumpkin.


If your pumpkin’s ribs are very deep, you should cut slits in the sides of the paper to allow it to fold over itself and fit to the pumpkin.

The scrapbook paper I used for the red pumpkin was more of a cardstock weight, so I needed it to get extra soggy to be able to mold it around the pumpkin. To do this, I mixed the mod podge with 3 parts water and 1 part mod podge. If your scrapbook paper is thin, you can mix it about 1 part water and two parts mod podge. 


  Dip the paper in the Mod Podge from top to bottom. Let it soak for about 30 seconds.


Lift the paper out of the Mod Podge and slide your fingers down it to wipe off the excess glue. Yes, this did ruin my manicure :-/


Lay the strip of paper over the rib that you cut it for. Line it up on the top first, then center over the rib. Start smoothing it down, starting in the center 


and then working your way to the bottom and then the top. 

You can use your brush to smooth it over and even out the Mod Podge. If any areas aren’t sticking, brush more Mod Podge under and on top of it and try smoothing it down again.


Once the first strip is in place. Do the same for the next strip, but be sure to measure from the edge of the last strip to the other side of the rib so there’s no gap. Add a little extra, about ¼”, so that the strips overlap just a little bit.

Repeat this all the way around the pumpkin. Each strip should dry before you make it to the opposite side of the pumpkin, but in case it doesn’t, allow time for it to dry, so you don’t set a wet side down on any surface. This will make a mess on you work surface and probably ruin your pumpkin.


When you get to the last strip, try to get the measurement pretty accurate so that it doesn't overlap the other pieces too much. Center it over the last rib and smooth it down. You can add a thin layer of Mod Podge over the pumpkin to cover any mistakes and give it a little glossy shine. 

The just let it dry and you're done!

Yes, that it a photo mosaic picture in my picture :-)