Wednesday, May 8, 2013

How to make a Burlap, Lace and Muslin Wreath

This is the third grapevine wreath I have made so far. I really love these. They're so rustic, yet elegant once they've been decorated. This one made of burlap, muslin and lace is going to be my summer wreath.  These are not only beautiful, but they're rather cheap to make. The wreath cost about $5, the fabric was another $4, and the lace and pearls were scraps from other projects.

Materials:
Grapevine Wreath
Twine or Sisal Rope
1/2 yard Muslin
1/2 yard Burlap
1/2 yard Lace
Pearl Beads
Hot Glue Gun
Hot Glue Sticks
Scissors
Pins


Start by cutting the fabrics into strips about 1" wide, going in the direction of the shorter side of the fabric. You can vary the widths to vary the sizes of the flowers. Save a few inches at the end to make the leaves.


Start by making the muslin flowers, since it's easier and it will give you practice to be able to make the burlap ones. Grab one corner of the strip of fabric and pinch it with your finger and thumb.


Start winding it around the center twist it as you go.

Try to twist it once about every third of the way around the flower, increasing the number of twists as you move outward.


Once you finish a flower stick a pin through it to hold it together.


For the burlap flowers, do the same thing but twist it less often. For the burlap and lace flowers, hold the strip of lace on top of the burlap. As you twist it, try to keep the lace on the top of the burlap.

Once you're done twisting all the strips into flowers, heat up your glue gun and cut circles of muslin and burlap the size of your flowers. Add hot glue in the spiral of the flower on the bottom side to hold it all together.

Stick the circle on the bottom of the flower while the glue is hot.

Once they've cooled a little, remove the pin and add a drop of hot glue in to the end of the strip of fabric to hold it in place.

Arrange the flowers the way you want them on the wreath. At this point, you can cut out leaves from the burlap to mix in with the flowers.


I ended up wrapping twine around the area where I wanted my flowers to go so that they had more to hold on to.

Pickup each flower and add a spiral of hot glue around the back of it. Then put in in place and hold it very for a few seconds.

Glue the pearls into the center of the flowers. Try to match the sizes; larger pearls on larger flower, smaller pearls on smaller flowers. You can also do clusters of pearls if you wish.


Hang and enjoy!


Wednesday, March 6, 2013

Making a Flower Pattern Table

I bought this table a yard sale about a year ago because I need a table about this size, but it wasn't the prettiest table I'd ever seen. I decided to spruce it up and paint it.
This is the pattern I used.

Materials:

  • Table
  • Sand Paper (Coarse, Medium and Fine Grit)
  • Sander (optional, but so much faster)
  • Wood Stain (Cabernet was the color I used)
  • Wood Varnish
  • Small Paint Brush
  • Large Paint Brush
  • Paper/rag towels
  • Spray Paint
  • Newspaper
  • Masking tape

Be sure you're working either outside or in a well ventilated area on this entire project. Start by cleaning off the table, making sure there's nothing sticky on it. Then either by hand or with a sander, start sanding off the top of the table with the coarsest grit sand paper you have. After most of the old finish has been removed, move to a medium sand paper and go over it again. Repeat with the fine grit sand paper. You should end up with a smooth finish-less table top.


Next, draw the design on the table top. If you want your design to start in the middle of the table, measure the width and length to find the exact center and start there.

Using a small paint brush, dip it in the stain and dab it in the center of the flower, brushing it outward just a little bit. Then, using the towel, wrapped around your fingers, blend it out toward the edge of the petal. Be careful to not blend too far out. It's easy to add more stain, but really difficult to remove it. You want the stain to be thick at the center and slow fade out to the edge where there should be little or no stain.

After the center petals are done, move on to the next layer by brushing a line of stain at the bottom edge of the petal. Try to just barely touch the pencil line that you drew. This will help to hide your lines and accent the edges.

Once you've been working on it for a little while, the towel will have a build up of stain that makes the blending a little easier. You can also dab your brush on the towel to add stain if it starts to get too dry. You want a nice smooth blend from inside to the outside. You can see my purple band-aid in the photo of me blending the petals.

Keep working your way around the flower from the center to the outer edges. Work in a well ventilated or outdoor area while working on this and take breaks often. Prolonged exposure to the stain fumes can be hazardous. I learned that the hard way when I got the worst headache I've ever had and then read the directions later.

Look around the table and do any final touch ups to make it perfect. I wanted the pattern to continue around the sides of the table, but I didn't paint the sides until the end because it was easier to see where the pattern was going once the top was complete.

After the stain is dry, add the varnish. Brush the varnish on in the same direction as the grain of the wood. Use long strokes going from one side of the table to the other. Follow the directions on your varnish for the dry time and number coats needed. Mine needed three coats with at least 2 hours, but not more then 24 hours in between each coat.

After the varnish is completely dry, it's time to paint the legs. Lay down newspaper or a drop cloth to protect the newly finished table surface. Lay the table upside down on the cloth or newspaper.  Use a towel to wipe off any dust from legs. Tape newspaper to the bottom side of the table to protect the top from any over spray. You can also paint the legs before sanding the top of the table, and then you don't need to be so worried about over spray. I wanted to make sure I could successfully complete the design on top first so that painting the legs wasn't a waste of my time.

Spray paint the legs with a nice thin coat of paint. Let it dry and then add another coat. Turn the table around to see all side in the best light to be sure you didn't miss anything.

After that, you're done!


Wednesday, January 16, 2013

Other Projects I Created Recently

Here are a couple of the projects I made over the last few weeks.

I really love vintage canisters, but most of them don't seal closed and that bothers me. I found these canisters and bottles at IKEA for a few dollars a piece. They have rubbers in the lid to seal them closed, but they're rather plain. I decided to add a vintage touch to them by making vinyl labels on my Cricut. 


Now that I have a house, I have a laundry room! Which is very exciting to me personally, because I used to have to go out to the patio of my apartment to do laundry. That was not fun in the rain. Or ever. I've been decorating our new laundry room with aqua and orange. I don't particularly like orange, but I love this color combo.

This is my "How To Do Laundry" sign. I designed it in Illustrator and then printed and framed it for my laundry room. My husband really wanted a list of all my rules for doing laundry and I wanted cute artwork for that room. This is one of my favorite things I've designed. If you want one, you can order it from my Etsy store in any color: www.etsy.com/listing/120520331/how-to-do-laundry-signart-print-in I also sell a horizontal version.

How To Do Laundry Sign
I made this laundry room vinyl sticker with my Cricut.


This 4 panel artwork I made by painting all the canvases white and then laying out my Cricut cut vinyl design over the canvases and spray painting it orange. I really like how this turned out.

Bird on a Branch four panel canvas


Monday, January 14, 2013

Wedding Shadowbox

I saw something like this somewhere and it inspired me to make this. It's a shadowbox filled with stuff from my wedding that I wanted to display, but keep safe. This was pretty easy and fun to make and I love looking at it hanging in our hallway.

 Materials:
12"x12" Shadowbox (about 1" thick)
Scrapbook paper for the background
Tape
Pins
Accessories you want to display


My shadow box included my veil, garter, hair comb, my husband's sheriff badge (we got married on a ranch), our program and one of the bookmarks that we gave as favors. The hardest part of making this was figuring out how to lay it all out so that everything could be seen, but look nice all together. As a rule thumb, the larger objects should go in the background and the smaller objects on top. Layering the items adds interest, just don't block anything important. And you should definitely try to use a contrasting background color paper. If all your items are light, use a dark background and if they're all dark, use a light background.


After playing around with it for about 20 minutes, I settled on this.


First, I laid the program down in the background and taped it to the background paper. Then, I taped down the comb of my veil so that the comb was under the fabric. I knew the book mark would cover this so I wasn't worried about about the tape showing. Then I attached my garter and the comb. These were trickier because I didn't want any tape or anything showing. I used sewing pins and poked them through the garter and comb and into the cardboard backing. If you get a shadowbox with a fabric background, it would be easier to attach. My shadowbox was pretty cheap, so it only had cardboard in the back. It was a little more difficult to get the pins to go through, but not impossible. I put the pins through the inside of the garter and folded it down so they won't show.


 The sheriff badge already had a pin on the back, so I just stuck that through. For the bookmark, I knew it would be pressed against the glass by my veil, but just to keep it from shifting after I close it up, I added folded over tape to the back of it.

Lastly, I decided that the top of the box looked a little bare, so I cut out a little calendar from a piece of scrapbook paper and circled our wedding date.


Then all I had to do was carefully put the frame around it and hang it without letting anything move. It took a couple tries to close it without letting anything move, but I think it's worth it! Just don't hang it in direct sunlight wear it will fade your precious items.


The Nikon D7000 is the camera I use for all my blog photos.

Tuesday, October 16, 2012

Halloween Plate Decals


For my second Halloween project, I wanted to make decorative plates. This was a pretty easy project. The most difficult part was designing the decals themselves, but there are plenty of graphics out there on the internet to use or you can just buy decals from a party store

Materials
Plates
SVG Files for Decals
Vinyl 
Transfer Tape or Masking Tape
Cricut
Sure Cuts A Lot Software
Exacto Knife


First, you'll need to setup the decals to cut. With your Cricut connected to your computer and the Sure Cuts A Lot software open and installed,
import the SVG file into Sure Cuts A Lot.

Measure the center of the plate where the decal will go and then scale your design to that size in Sure Cuts A Lot.


Cut the design with the proper settings in place. You want your blade to cut through the vinyl completely but not through the paper backing.  I had my blade pressure set to 3.

After you cut the design, peel out all the unnecessary parts left behind.

Then cut the design off the sheet of vinyl so you don't waste any vinyl and peel off the out part of the design.

Lay your transfer tape (or masking tape) over the design.

Peel the backing paper off the vinyl and place the it over the center of the plate. Smooth it over and slowly lift off the transfer tape. If the decal starts to lift off the plate  press the tape back down and rub that area better before continuing to lift it off.

The finished plates


I used the reversed portion of my pumpkin decal as a window decoration :-)

Tuesday, October 2, 2012

How to Decoupage Pumpkins

Today, I wanted to start my Halloween themed projects for October. The first one of these projects is decoupaged plastic or styrofoam pumpkins. I thought these were a really cute alternative to plain pumpkins. This is pretty simple, although it can be a little messy and you will difinietly have you hands covered in Mod Podge by the end of it.


Materials

Foam/Plastic Pumpkin
3-4 sheets Scrapbook Paper
Modpodge
Wide Paint Brush
Bowl
Water
Scissors/Exacto Knife
Paper Slicer (optional)


The main idea is that you’ll put one piece of paper over each rib (the vertical stripes) of the pumpkin. If your pumpkin is very symmetrical and even, you can cut all the strips of paper the same size. If the width of the ribs in the pumpkin vary, you should measure each one before you cut it. This pumpkin was very even, so each strip of paper was just over 2”.
Start by measuring for your first strip of paper. Be sure to allow for the depth of the rib by rolling the ruler around the rib as you measure.

Then cut one strip of paper at that width.

Round off the top and bottom of the strip to match the curve of the pumpkin.


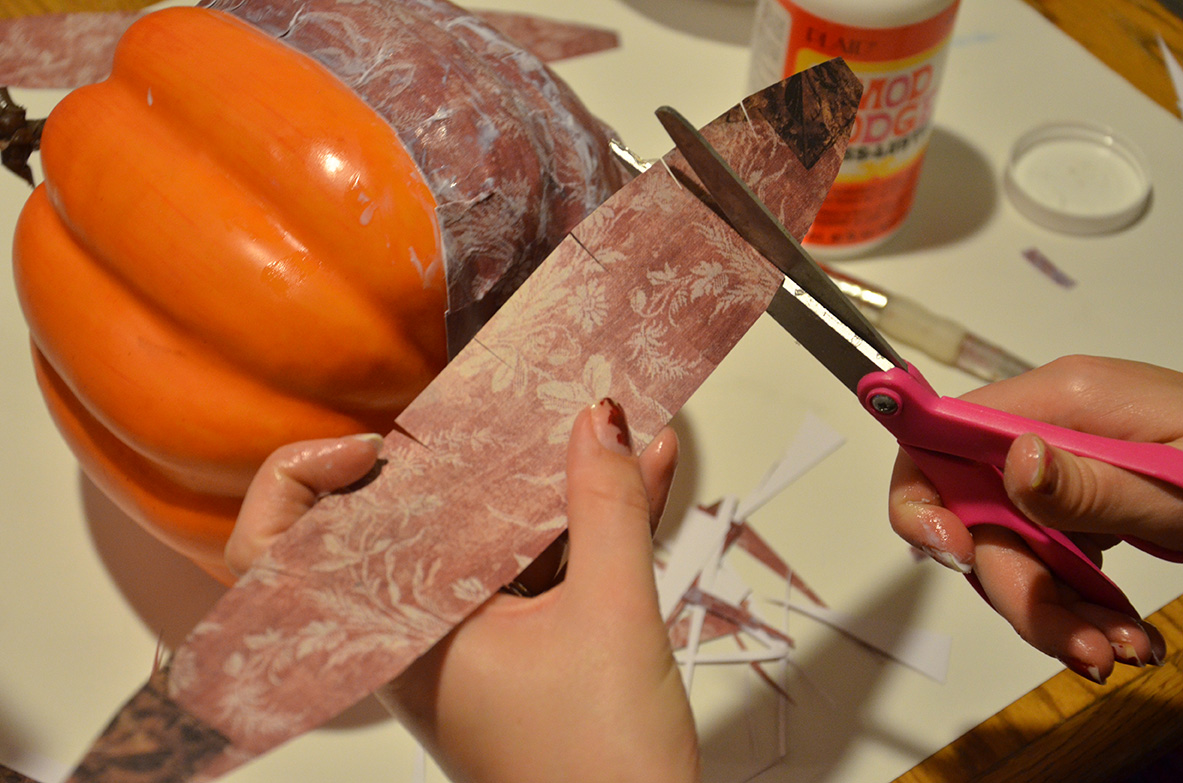
If your pumpkin’s ribs are very deep, you should cut slits in the sides of the paper to allow it to fold over itself and fit to the pumpkin.

The scrapbook paper I used for the red pumpkin was more of a cardstock weight, so I needed it to get extra soggy to be able to mold it around the pumpkin. To do this, I mixed the mod podge with 3 parts water and 1 part mod podge. If your scrapbook paper is thin, you can mix it about 1 part water and two parts mod podge. 


  Dip the paper in the Mod Podge from top to bottom. Let it soak for about 30 seconds.


Lift the paper out of the Mod Podge and slide your fingers down it to wipe off the excess glue. Yes, this did ruin my manicure :-/


Lay the strip of paper over the rib that you cut it for. Line it up on the top first, then center over the rib. Start smoothing it down, starting in the center 


and then working your way to the bottom and then the top. 

You can use your brush to smooth it over and even out the Mod Podge. If any areas aren’t sticking, brush more Mod Podge under and on top of it and try smoothing it down again.


Once the first strip is in place. Do the same for the next strip, but be sure to measure from the edge of the last strip to the other side of the rib so there’s no gap. Add a little extra, about ¼”, so that the strips overlap just a little bit.

Repeat this all the way around the pumpkin. Each strip should dry before you make it to the opposite side of the pumpkin, but in case it doesn’t, allow time for it to dry, so you don’t set a wet side down on any surface. This will make a mess on you work surface and probably ruin your pumpkin.


When you get to the last strip, try to get the measurement pretty accurate so that it doesn't overlap the other pieces too much. Center it over the last rib and smooth it down. You can add a thin layer of Mod Podge over the pumpkin to cover any mistakes and give it a little glossy shine. 

The just let it dry and you're done!

Yes, that it a photo mosaic picture in my picture :-)