Tuesday, October 7, 2014

Refinishing a Vintage High Chair


While I was refinishing my kitchen table, I decided to paint an old high chair I had found. It was a cute chair and I really like it. It reminded me of the one my grandma had and used with me and my siblings and cousins and probably my dad and aunt and uncles too. I was really well built, just a bit dirty and scratched.


It was pretty easy to refinish it, but my main issue was that the tray was missing. I considered forgoing the tray and just making it table height so I could pull it up to the kitchen table, but then I thought I might regret that decision in the future. Not liking to take shortcuts, I made a new tray. In retrospect, it probably would have been much easier to buy the tray from the internet (yes, people sell them! Check it out here or here), but I saved about $30 by buying a piece of solid oak at Home Depot instead. Cutting it to the right shape was super easy using a jigsaw, but making the indentation so food doesn't spill straight on the floor was so much harder than I thought it would be. I borrowed my dad's electric planer and carved out the center, but this left it very uneven and rough. I used a belt sander, palm sander, and Dremel with a sanding bit to try to fix it. Eventually, I primed it, used wood filler to fix big gaps and painted it and sanded it again to get it to where it is now. And I'm still not happy with it!  Oh well, it'll do for now.


I also had to buy the hardware for the tray. The half that was attached to the chair was still there, but I needed the part that went on the tray. I opted for this version: High Chair Tray Hardware, which is exactly the same as what was on there! I even used the same holes for the screws. So, I attached the all new hardware to the chair and tray. This was a little tricky because I had to line up the tray with the chair and mark the edges of the hardware so I could drill the screw holes. After one mishap with them being to close together, I fixed it, and now it works perfectly!


Here's how the refinishing goes if you have your complete high chair

Materials:
  1. High Chair (including tray)
  2. Sand paper
  3. Spray Paint
  4. Food Safe top coat (this is the one I used)
  5. Hardware (old or new)
  6. Safety Strap (Make your own, buy new, or use the old one if it's in good condition)

Instructions:
  1. Remove all hardware and safety strap
  2. Clean all surfaces
  3. Lightly sand all surfaces
  4. Clean again to remove dust
  5. Spray paint 1 coat while the chair is upright
  6. Spray paint 1 or 2 coats while the chair is upside down
  7. Spray paint 1or 2 coats while the chair is upright again until all surfaces are evenly covered
  8. Spray clear food safe top coat
  9. Attach old or new hardware and safety strap
  10. Enjoy your awesome high chair!
If you're also missing the tray, buy the tray and hardware in advance. If you don't want the tray to have the indentation to catch food and liquids, then you can save some money by buying a solid board and cutting it to the proper shape. Sand the edges and surfaces to smooth them out before priming and painting. 

I also made a new safety strap because the old one was worn, dirty and brown. I bought black strap material at Joann that was the same size as the old one. I used the same clip because I couldn't find a new 3-point clip, so I just washed it really well. I used the old strap as a pattern, sewed the new one and stapled it in place with a staple gun to the bottom of the chair.


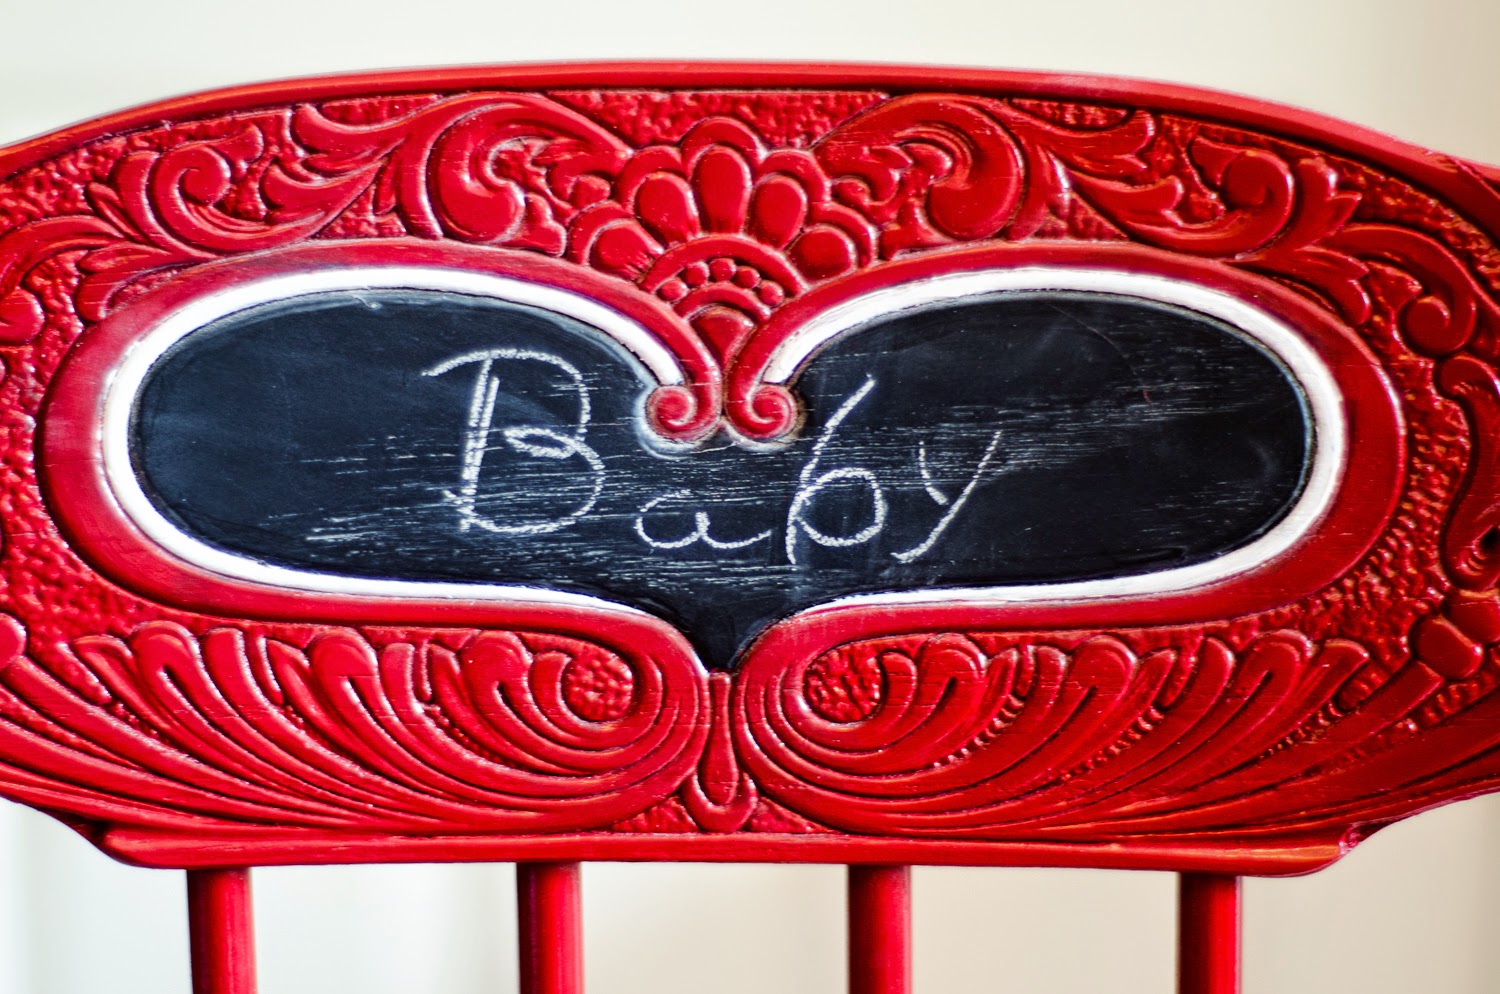
Because my high chair had this adorable carving on the back of the seat, I painted the heart in with chalkboard paint and outlined it with white paint.


Saturday, July 19, 2014

Refinish an Old Kitchen Table

When I was getting married and moving out, all of my friends and family seemed to see it as their opportunity to get rid of all their old, unwanted furniture. "Give it to the newlyweds! they need furniture," must have been what everyone was thinking. In many case, this came in handy. I didn't have to buy expensive furniture or hunt it down somewhere, but a lot of the stuff I was given was old and not really fitting with my preferred style. Luckily, spray paint exists! I've refinished quite a few items now, but I feel like my kitchen table is one of the most dramatic transformations.

This table is really well built and stable and it has two leaves so it can be small enough for six people or large enough for ten to twelve if needed. However, it wasn't in great condition and I wasn't a big fan of the oak color. I don't even have a good before picture because I didn't think to take one and I always had a tablecloth on it to hide the scratched and stained tabletop.

Here is the table with the table cloth on it when it was in my apartment.


table in apartment

Now that I have a house with a garage, I can paint stuff!

I started off by flipping the table over and painting the underside. As you can see. I laid down newspaper and taped it in place so that I wouldn't ruin the top of the table. Doing the painting first affords you the chance to sand off any stray paint that might accidentally get on the tabletop where you're going to sand.

I lightly cleaned off the surfaces and sanded lightly sanded it all over so that the paint would hold well. I did about 3 light coats of paint an hour apart. 

painting the bottom of a table white

I realized after I finished painting the base, that I had forgotten to pull out the leaves and paint those as well. I taped and covered the table top and spray painted the section just below the tabletop (the frame? skirt? I'm not sure what the area is called).

Spray painting a kitchen table white
If you're worried about the floor, put a tarp down so you don't get that nice over spray ring on the ground.

After I had finished painting the bottom white, I sanded all the top pieces. I started with a 80 grit sand paper on a palm or pad sander to remove all the old varnish. After most of the old finish was gone, I moved to a 120 grit sand paper on my sander. I smoothed it out with a 200 grit paper. (If you're not familiar with sand paper, the lower numbers mean rougher paper and the higher numbers mean more smooth paper. You usually work from low to high to remove old finishes and then even and smooth the surface as you go)

Sanding a kitchen table for refinishing

After the old finish was removed, the surface was smooth, and the table cleaned with a rag towel, I stained it with a dark walnut colored stain. Maybe because the color I chose was so dark, the stain was really thick, almost like paint. I applied it with a 3" paint brush. When I tried to add a second coat, the first coat started coming off. I've never had this happen with stain before (it's supposed to stain, right?), so I fixed the area I had tried to re-coat and left it alone.


When the stain was thoroughly dry (I believe I waited a full day), I started applying the varnish. I did 2 coat in one day, 2 hours apart and 2 coats the next day, also 2 hours apart.
One of my future projects, reupholstering and converting a chair into a rocker, is in the background there.

staining a kitchen table dark walnut color

At that point, I started working on the chairs. I cleaned them all, which was no small task since they were 20 years old. I use hot water and in some case kitchen cleaner to remove dirt and stains as best as I could.Once they were dry, I used a medium (120) grit sand paper to rough up the surfaces of the chairs. I used the palm sander on all the flat surfaces I could, especially the seat, where I knew there would be a lot of use. I didn't strip the old varnish, because I didn't want to prime the chairs, just made a good surface for the paint to adhere to.

spray painting dining chair red

This is the paint I used on the chairs. It worked really well and I love the color.


I lightly spray each chair twice while the chair was upright and then coated it again the next day while the chair was upside down to get all the spots I missed. After doing any necessary touch-ups, I coated all the chairs with two gloss clear coats to protect the paint and keep the color from transferring to other surfaces. I think the clear coat was pretty import because it's such a bold color that if it rubs against the white table it would definitely leave a mark. 

spray painting dining chair red

After a solid week of drying in the garage, I brought the table and chairs into my kitchen/dining room. I have to say, I love them now! I'm so glad I refinished them instead of buying something new. They've also held up really well. The table surface looks great and it matches my kitchen perfectly!


Thursday, February 20, 2014

Picture Frame Turned Earring Rack


While redecorating my bedroom, I lost the surface on top of which I stored my jewelry. I was also really tired of fighting with my old earring holder and so I decided to make a new one. The new one had to be wall mounted to fit in my new bedroom layout. My problem is that I have a lot of jewelry, so my new earring needed a lot of space. My other frustration with my old earring rack was that I had to take the backs off the earring and put them on again behind the rack. This took so much time and I so frequently dropped the earring back that I wasn't wearing them because it was too much of a hassle. I had seen a couple things online that I liked, but most didn't have as much storage as I needed. So, I came up with this picture frame turned earring rack! My favorite part of this rack is that you can just lift the earrings off and set the on it!!!

Materials
11"x14" picture frame (or however large you want yours to be)
3 strips of wood 1/4"x1/8"x36" (available at Joann or other hobby stores)
Wood Glue
Spray Paint
Dremel & Cutting Wheel attachment


  1. Remove the glass and other innards from your picture frame.
  2. Cut the strips of wood to the size of your frame. 11" in my case.
  3. Make a mark every 1/4" across the strips of wood starting and ending 1/2" from the edge
  4. With the dremel, make an 1/8" deep cut from the top of the wood at each mark.
  5. Glue the strips of wood to the inside of the frame with the wood glue.
  6. After the glue it completely dry, spray paint the whole rack, if desired.
  7. Done!

Wednesday, February 19, 2014

DIY Upholstered Headboard

Last month I decided to redecorate my bedroom. One of the items I need most was a new bed frame and headboard. I started by making the headboard below. I hesitated for a while before starting this project because I thought it would be really difficult, but it ended up being much easier than I thought. I had a few setbacks, but with a little trial and error, I eventually got it right. If you decide to take on this project yourself, you have the advantage of learning from my mistakes :-)

Materials
Sturdy 6'x4' Plywood Board (for Cal King, wider for King)
6'x4' (for Cal King, wider for King) - 1" thick Foam
Twin Size Batting - High-loft
Upholstery Fabric - 5'x7' minimum
150-250 Upholstery Nails
Staple Gun and Staples
Adhesive Spray

I started by picking the design I wanted for my headboard and drawing it onto the plywood. First, I cut the plywood down to the correct width. Then I used my pin-string-pencil compass method of making arcs, since I couldn't find anything to trace that was the right size. (This method involves tying a string between a pencil and a pin, holding the pin at the center of the circle, and then rotating the pencil around the pin in an arc, keeping the the string tight as you draw)
DIY Upholstered Headboard
After the design was drawn onto the board, I used my jigsaw to cut out the shapes. This was a lot easier than I thought it would be. I started at one side, cut out the arcs, making my way to the center, then starting again from the other side.
DIY Upholstered Headboard

I then laid the 1" foam on the board and cut it 2 inches from the edge of the board with sharp fabric scissors, but a large rotary cutter might have been easier.

DIY Upholstered Headboard

I sprayed the front of the wood and the back of the foam with spray adhesive by lifting half of it off the board, spraying it, and laying it back in place. Then I repeated it from the other side. Next, I laid the batting over it all and soothed it out.

DIY Upholstered Headboard

After I smoothed it around all the edges, I used the same spray adhesive method on the batting too to keep it from shifting over the years.

DIY Upholstered Headboard

Once the adhesive dried, I laid the fabric over it. I prewashed, dried and ironed my fabric to get all the wrinkles out. Be sure to use a gentle or hand wash setting if you wash you fabric. It will fray a bit, but it shouldn't fall apart (if it does, it's not suitable for this project). At first, I tried just hammering in the upholstery nails straight along the edge of the foam, but this proved incredibly difficult and made a really crooked edge. 

So, after a little trial and error, I folded the fabric back over itself and 
stapled 1 3/4" of an inch from the edge of the board. 

DIY Upholstered Headboard

The made a much cleaner line and made it way easier to get the upholstery nails into it. 

DIY Upholstered Headboard

After I had all the straight edges down, I folded the fabric around the back and added a couple staples to hold the fabric back. I didn't staple it down completely because I hadn't yet finished the curved areas.


DIY Upholstered Headboard

Next, I marked every 1/2 inch in a line about 1 1/2" from the edge of the board. 

DIY Upholstered Headboard

I found it to be much easier to add the upholstery nails if a held the nail in place with needle nose pliers while hammering.

DIY Upholstered Headboard

When I got to the curves, I folded the fabric back as shown below, but I didn't stapled the curved areas.

DIY Upholstered Headboard

After all the nails were in, I finished stapling the fabric behind it and mounted it on my bed frame.
DIY Upholstered Headboard

DIY Upholstered Headboard

DIY Upholstered Headboard

DIY Upholstered Headboard